Technical workflows
Usually we work on a Debian stable or testing computer, but to build and test security updates, we need an environment that matches the target dist: oldstable/oldoldstable for LTS, and even older for ELTS.
There’s (often) more than one way to do it (TIMTOWTDI). Here are two main approaches. Different parts may be combined.
When a section grows big, consider moving some of the content to the Debian Wiki, and only keep LTS/ELTS-relevant bits here.
Note: while ELTS is not part of Debian, we include some ELTS-based instructions as it’s common to reuse ELTS work for LTS and vice-versa.
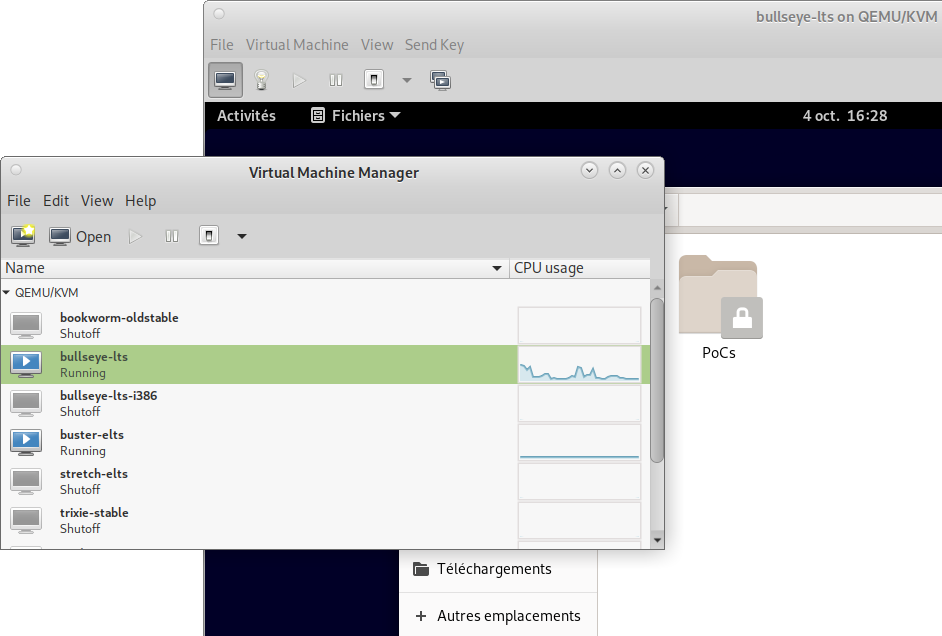
Full target virtual machines
This workflow involves doing most of the work within a complete virtual machine.
No pollution from newer environments, including when building source packages
Security isolation at all times; e.g. credentials (Salsa) not available by default
Match our end-users’ environment, including kernel
Graphics support by default, including full-desktop environment
Use tools from target dist at all times (compatibility) (autopkgtest, piuparts, lintian, etc.)
Snapshots
Easy multi-VMs / networking setup
Fast iterative development/debugging (fix/
make/fix/make) rather than lengthy rebuilds from scratch
Cons:
Manual install
More suited for remote-style development (SSH/text-mode); sshfs or qemu-virtfs can help
Credentials (Salsa) not available by default ;)
Use tools from target dist at all times (may lack new features)
Limited autopkgtest (no
full-isolation)Build environment may become unclean / non-minimal as testing goes, but salsa/debusine test in minimal environments, and reverting to previous VM snapshots allow easy clean-up
git-buildpackage without git-builder may be less convenient; with git-builder it may be redundant (light-container-in-full-vm)
Example:
Install
libvirtand its defaultvirbr0bridge (192.168.122.0/24).Use
virt-managerwith the QEMU backend to easily create VMs.Install a full graphic system using the default Debian installation method: using an ISO file. Do this for each release you need (e.g. trixie-stable, bookworm-lts, bullseye-lts, buster-elts, stretch-elts).
Install SSH and some remote development tools (emacs-nox, vim…).
Create a SSH key and add it to Salsa with an expiration date (isolate your main SSH key, especially when testing untrusted exploits).
Update your VM with the latest security patches, and create a clean base snapshot.
Clone the VM in case you need more than 1 VM, e.g. client/server or minimal cluster setup.
Build locally using
git-buildpackage, or even plainapt-source+debuildand latergbp import-dsc.Run autopkgtest within the VM, possibly with an LXC setup.
Run any target tool as usual within the VM without additional containers/chdist setup.
Retrieve the final package via scp or sshfs, then sign & upload from the host.
Reset to the last clean snapshot, apt upgrade again and create a new clean base snapshot for the next package.
Note: previously VirtualBox could be used, but due to its open-core model, plus licensing issues in said core, that package hasn’t migrated from sid to testing for many years and can’t be recommended anymore.
Post-install
For in-VM development you’ll need a few non-default packages, and some configuration tweaks:
# Minimal/controlled package installation in a dev VM:
echo 'APT::Install-Recommends "false";' > /etc/apt/apt.conf.d/00InstallRecommends

apt install build-essential devscripts fakeroot quilt patch lintian
apt install rsync apt-rdepends net-tools git
apt install git-buildpackage pristine-tar autopkgtest autodep8

# clean-up /etc/apt/sources.list

# .bashrc: add or edit:
# If this is an xterm set the title to user@host:dir
case "$TERM" in
xterm*|rxvt*)
    #PS1="\[\e]0;${debian_chroot:+($debian_chroot)}\u@\h: \w\a\]$PS1"
    PS1="\[\e]0;\h: \w\a\]$PS1"
    ;;
*)
    ;;
esac

# .bashrc: enable '-i' aliases

# 'source' this when developing
cat <<EOF >> ~/debian.sh
export DEBEMAIL=you@debian.org
export DEBFULLNAME="Your Name"
EOF
GUI configuration:
Disable screensaver & power-saving (no need for a VM)
Additional preferences:
Beuc:
apt install screen aptitude emacs dpkg-dev-el terminator
# trixie: dpkg-dev-el -> elpa-dpkg-dev-el

# ~root/.emacs and ~user/.emacs
(add-hook 'after-change-major-mode-hook (lambda() (electric-indent-mode -1)))
(rassq-delete-all 'diff-mode auto-mode-alist)
(custom-set-variables
 '(inhibit-startup-screen t))

# Terminator > Preferences > Profiles > Scrolling > [X] Infinite scroll
git-buildpackage
Without --git-builder, gbp often requires cleaning-up the repo
after a build; a common debugging workflow can be:
git commit --amend -m "WIP" debian/
git checkout .
git clean -fxd
gbp buildpackage ...
# repeat
Otherwise, just use an external builder e.g. --git-builder=sbuild
or --git-pbuilder though you’ll have to set it up within the VM.
ccache
When iterating on a package, with many rebuilds, ccache can speed up the process.
Explicitly setup CCACHE_DIR, as HOME gets replaced during the
build (doc).
apt install ccache

export PATH=/usr/lib/ccache:$PATH
export CCACHE_DIR=~/.cache/ccache

debuild -e PATH -e CCACHE_DIR
gbp buildpackage --git-builder='debuild -e PATH -e CCACHE_DIR -i -I'
Host + light containers
This workflow does most of the work in one’s environment and start light target environments as needed.
Pros:
Unattended install
Uses standard develpment environment
Credentials available by default (Git, etc.)
Volatile environments
Cons:
Possible pollution from newer Debian environment
Need to be more careful with security isolation (credentials, untrusted PoC/exploits testing)
Harder/longer to setup a full test desktop environment
May not match our end-users’ environment: no bootloader, no graphics, testing-oriented enviroment (e.g. default user is root).
May use incompatible newer tooling (e.g. previous autopkgtest issues with jessie)
Harder to make quick iterations when working on a CVE fix.
Example:
Use your normal development environment (editors, etc.)
Don’t run PoCs and exploits directly, create ad-hoc
debvmsRun builds on Salsa CI, or ephemeral sbuild chroots
Run local builds with
git-buildpackage
--git-builder/--git-pbuilder
, e.g.gbp buildpackage --git-builder=sbuilder --no-clean-sourceRun autopkgtest with autopkgtest-build-qemu
Use chdist to check apt/packages status in other dists.
In the past we had to build packages locally, either to upload them as binaries, or to test the build in a clean environment prior to crossing fingers and sending it to official buildds. Nowadays Salsa CI and debusine do this for you, but we keep the information in case a manual rebuild is needed, typically for debugging or whenever there’s an issue/limitation with the CI.
sbuild
sbuild documentation and cheat sheets:
Be sure to install the latest (trixie / bookworm-backports) sbuild
with unshare support, like Debian buildds and possibly
debusine. Moreover there’s no need for chroots configuration anymore:
apt install sbuild mmdebstrap uidmap arch-test apt-cacher
autopkgtest and piuparts need to installed on the host:
sudo apt install autopkgtest autodep8
sudo apt install piuparts adequate
The following may also apply to porter boxes as sbuild/unshare is being deployed through 2025, giving you more flexibility with your build and test environments.
Some default configuration:
mkdir ~/.config/sbuild/
wget https://deb.freexian.com/extended-lts/archive-key.gpg -O /var/tmp/freexian-archive-key.gpg

cat <<'EOF' >> ~/.config/sbuild/config.pl
# Use newer unshare backend
$chroot_mode = "unshare";

# Investigate failures
$external_commands = { "build-failed-commands" => [ [ '%SBUILD_SHELL' ] ] };

# Cache chroot tarball
$unshare_mmdebstrap_keep_tarball = 1;
$unshare_mmdebstrap_max_age = 8640000;  # 10 days

# Since trixie, /tmp is tmpfs and large builds will fail after
# filling all memory..
$unshare_tmpdir_template = '/var/tmp/tmp.sbuild.XXXXXXXXXX';

# Transparent ELTS support
push @{$unshare_mmdebstrap_extra_args},
   qr/^(buster.*|stretch.*)$/,
  ["--include=freexian-archive-keyring",
   "--keyring=/var/tmp/freexian-archive-key.gpg",
   "http://deb.freexian.com/extended-lts/"];
# TODO: same for piuparts? currently fails with ELTS
# TODO: alternatively, use a split archive.d.o + xxx-lts APT setup in sbuild?

# Strips -lts suffix in ELTS (-security already handled by default)
# (useful when called from gbp with xxx-lts in the changelog dist)
push @{$unshare_mmdebstrap_distro_mangle}, qr/^(.*)-lts$/ => '$1';

# apt-cacher (apt install apt-cacher || apt install apt-cacher-ng)
push @{$unshare_mmdebstrap_extra_args}, "*",
  ['--aptopt=Acquire::http { Proxy "http://127.0.0.1:3142"; }'];

# Useful when using git-buildpackage from a different dist
# https://manpages.debian.org/trixie/sbuild/sbuild.conf.5.en.html#CLEAN_SOURCE
#$clean_source = 0;
EOF
Examples:
sbuild -d bullseye hello_2.10-2.dsc --run-autopkgtest --run-piuparts

sbuild -d buster hello_2.10-2.dsc --run-autopkgtest

sbuild -d stretch --arch=i386 hello_2.10-1+deb9u1.dsc --run-autopkgtest

# Note: autopkgtest-virt-unshare reuses sbuild's chroot tarballs cache (~/.cache/build/)
# This works directly too:
autopkgtest hello_2.10-2.dsc hello_2.10-2_amd64.changes -- unshare -r bullseye

# From git-buildpackage
gbp buildpackage --git-builder=sbuild --no-clean-source ...
# Explicit dist when changelog targets UNRELEASED (unstable by default)
gbp buildpackage --git-builder='sbuild -d buster' --no-clean-source ...

# Use a specific version of a specific package; in this example, we suspect that the
# latest libxml2 (2.9.10+dfsg-6.7+deb11u9) may have caused a problem, so we want to build
# specifically with version 2.9.10+dfsg-6.7+deb11u8
sbuild -d bullseye bind9_9.16.50-1~deb11u4.dsc --extra-repository="deb [check-valid-until=no] http://snapshot.debian.org/archive/debian-security/20250728 bullseye-security/updates main" --build-dep-resolver=aspcud --add-depends="libxml2-dev (= 2.9.10+dfsg-6.7+deb11u8)" --no-run-lintian

# Debugging "break point" before the build
sbuild --starting-build-commands %s
gbp buildpackage --git-builder='sbuild --starting-build-commands %s --no-run-lintian' --no-clean-source --git-ignore-new
Troubleshootings:
sbuild -d buster hello_2.10-2.dsc
# KO with default configuration: buster is archived and not available
# -> see configuration above to auto-add mmdebstrap ELTS parameters

sbuild -d bullseye hello_2.10-2.dsc --run-autopkgtest  # KO, not installed
# needs autopkgtest installed on the host

sbuild -d bullseye hello_2.10-2.dsc --run-piuparts
# => WARNING: /home/ela/build/hello_2.10-2_arm64.changes is not readable. Skipping.  [+ exception]
# The piuparts unshare backend requires the build dir to be a publicly
# accessible (``+x``) hierarchy (e.g. not in your home dir) :/
ccache
See: https://wiki.debian.org/sbuild#Using_ccache_with_sbuild
chdist
To check the status of packages or uninstallability issues without a chroot:
chdist create bookworm http://deb.debian.org/debian bookworm main
# Add security
cat <<'EOF' >> ~/.chdist/bookworm/etc/apt/sources.list
deb     http://security.debian.org/debian-security bookworm-security main
deb-src http://security.debian.org/debian-security bookworm-security main
EOF
#chdist <command> bookworm <args>
chdist apt bookworm update
chdist apt-cache bookworm policy hello
chdist apt bookworm source hello
...
For ELTS:
chdist create buster-elts https://deb.freexian.com/extended-lts buster main
apt install freexian-archive-keyring
ln -s /etc/apt/trusted.gpg.d/freexian-archive-extended-lts.gpg \
   ~/.chdist/buster-elts/etc/apt/trusted.gpg.d/freexian-archive-extended-lts.gpg
# or get it from https://deb.freexian.com/extended-lts/archive-key.gpg
# Add staging area:
cat <<'EOF' >> ~/.chdist/buster-elts/etc/apt/sources.list
deb     https://deb.freexian.com/extended-lts-staging buster-lts-proposed main
deb-src https://deb.freexian.com/extended-lts-staging buster-lts-proposed main
EOF
VM automation
debvm
Light VMs tailored for specific testing.
They are minimal and created from scratch using mmdebstrap (no
third-party images).
apt install debvm

# LTS
debvm-create -r bullseye -o bullseye.ext4
debvm-create -r bullseye -o bullseye.ext4 \
  --size=3G -k ~/.ssh/id_xxx.pub

# ELTS requires both --keyring and freexian-archive-keyring.
# Using split archive.d.o / deb.f.c to ease Freexian bandwidth.
debvm-create -r buster -o buster-elts.ext4 \
  ...
  -- \
  --keyring=/public/path/to/archive-key.gpg \
  --include=freexian-archive-keyring \
  http://archive.debian.org/debian/ \
  "deb http://deb.freexian.com/extended-lts $DIST-lts main"
debvm-create -r stretch -o stretch-elts.ext4 \
  ...
  -- \
  --keyring=/public//path/to/archive-key.gpg \
  --include=freexian-archive-keyring \
  http://archive.debian.org/debian/ \
  "deb http://deb.freexian.com/extended-lts $DIST-lts main"
The part after -- is passed to mmdebstrap.
Optionally pre-install additional packages:
--include=strace,vim,emacs-nox,... \
For apt-cacher, provide an URL accessible from the host and the VM
(also update apt-cacher.conf:daemon_addr/allowed_hosts):
--aptopt='Acquire::http { Proxy "http://192.168.122.1:3142"; }' \
You can add the ELTS staging repo:
"deb http://deb.freexian.com/extended-lts-staging $DIST-lts-proposed main" \
You can enable graphics (cf. debvm-create(1)):
TMPDIR=/var/tmp
...
--size=8G  # >4GB
-- \
--hook-dir=/usr/share/mmdebstrap/hooks/useradd \
--aptopt='Apt::Install-Recommends "true"' \
--include=linux-image-generic,task-gnome-desktop \
# for <= buster: no linux-image-generic
--include=task-gnome-desktop \
Run the VM:
debvm-run -i bullseye.ext4

# better access the VM and transfer files using SSH
debvm-run -i bullseye.ext4 --sshport 2222
ssh -p 2222 -o StrictHostKeyChecking=no root@localhost

# if graphics support, default password-less 'user'
apt install qemu-system-gui
debvm-run -i bullseye-gui.ext4 -g -- -m 2G
# Note: root access still available through View > serial0
The part after -- is passed to qemu.
See Create an arm* VM for ARM-specific options.
Note: this is an ad-hoc VM: there’s no GRUB, by default there’s no graphics and it logins with a password-less root user, etc. This may not be suitable for all kinds of testing or closely reproducing the user’s environment, but this works fine for running temporary tests.
Troubleshootings:
The following signatures couldn’t be verified because the public key is not available: NO_PUBKEY A07310D369055D5A
Due to unshare, ensure freexian-archive-key.gpg is in a
publicly accessible (+x) hierarchy (e.g. not in your home dir).
Also check the output of gpg:
$ gpg --list-key --no-default-keyring --keyring /.../freexian-archive-key.gpg
...
pub   rsa4096 2018-05-28 [SC] [expires: 2027-12-05]
      AB597C4F6F3380BD4B2BEBC2A07310D369055D5A
E: unable to pick chroot mode automatically (use –mode for manual selection)
Add e.g. --mode=unshare at the end of the debvm-create line,
or run through sudo.
Package ‘linux-image-generic’ has no installation candidate
When generating a graphics-enabled VM, the documentation recommends
adding --include=linux-image-generic, however this virtual package
isn’t available before bullseye. Leave that out.
No space left on device
Since Trixie, /tmp is a tmpfs and this causes lots of silly issues
with debvm or autopkgtest. Set TMPDIR=/var/tmp which is on-disk,
or disable this with systemctl mask tmp.mount.
Incus
Incus is a system to manage VMs and containers, with similarities to libvirt and docker.
It uses pre-built system images.
The first thing to do is setting up incus and the TLDR is:
sudo apt install incus
sudo adduser $USER incus-admin
newgrp incus-admin  # or login again
incus admin init
# follow the wizard

# TODO: there are lots of questions and some errors, maybe provide
# answers most suitable for LTS/ELTS work, and possibly
# troubleshooting for errors (e.g. User does not have permission for project "default")
To create and launch a container image using the images provided by the default image server, one command is enough:
# LXC-based container
incus launch images:debian/bullseye <container-instance-name>

# QEMU-based virtual machine
apt install ovmf && systemctl restart incus
incus launch images:debian/bullseye --vm <vm-instance-name>
Note
The default image server has images up to LTS, for ELTS images, you will need to build yourself. There is a guide available on how to build buster images.
TODO: summarize ELTS-oriented instructions here
TODO: VMs from debusine; from the October meeting: “incus need a little bit of help, but it can ingest qcow2 images, so we can use the ones [generated] in debusine”
After that, one can check if the instance is up with the list subcommand
and hop into the instance with the shell subcommand:
incus list
incus shell <instance-name>
To copy files from and to the instance,
one can use the file subcommand:
incus file push /path/to/local/file <instance-name>/path/to/remote/file
incus file pull <instance-name>/path/to/remote/file /path/to/local/file
To get a VM with graphical interface, just set it up when launching the VM and make sure it has enough RAM to run Gnome:
apt install spice-client-gtk  # L_Shift+F12 to exist fullscreen
incus launch --vm images:debian/bullseye <vm-instance-name> \
             --config limits.memory=3GiB \
             --console=vga
# TODO: the base image is minimal and has no graphic packages
# -> how to install Gnome in a standard way
TODO: currently this section is mostly a generic incus tutorial, this needs to provide LTS/ELTS developer-related instructions primarily. Also this document probably isn’t meant to showcase all container solutions (docker, systemd-nspawn, vagrant, debvm…) so maybe we need to rethink our approach. This may fit better as another example in the “Full virtual machines” section. If there’s a way to integrate with gbp (as with sbuild) this could also go in another section in “Light containers”.
autopkgtest
autopkgtest has dedicated tooling autopkgtest-build-qemu
(vmdb2-based) and mmdebstrap-autopkgtest-build-qemu to provide
full isolation-machine, see autopkgtest
for LTS/ELTS examples.
Foreign architectures
i386 environments are compatible with amd64 hosts, usually with an
optional like --arch i386.
ARM environments are better tested from porter boxes, unexpensive
boards (ARM local debug), or through slow VMS, for instance
with debvm (Create an arm* VM). arm64 can similarly run armhf and
armel using --arch.
Testing
Salsa CI and debusine both offer much CI tooling.
For setting up Salsa CI, see Git workflow.
For debusine, see wiki:DebusineDebianNet.
See Test Suites for manual tests or build procedures for specific packages.
Manual CI tests
Salsa CI and debusine may have limitations or fail to handle some corner cases. Running them manually can help debugging, and you can use a version closer to (E)LTS.
Source checks: inspect overall source changes since last release, even if you used Git:
debdiff package+deb11u3.dsc package+deb11u4.dsc | diffstat
debdiff package+deb11u3.dsc package+deb11u4.dsc | colordiff | less -R
If possible, check the binaries too to detect missing or extra files:
debdiff --from bookworm-old/*.deb --to bookworm-new/*.deb
Lintian: check for common packaging issues in the last build from extracted source after build, in a bookworm host (only check new errors).
lintian -i
piuparts: test package upgrade:
sudo piuparts -d bookworm \
  --extra-repo='deb http://security.debian.org/ bookworm-security main' \
  -l piuparts-package.log \
  -I :etc/buggy-dep \
  --single-changes-list package+deb11u4_{all,amd64}.changes \
  | grep -P '(INFO|ERROR):'
# also consider --install-remove-install

# For archived/expired dists, use an existing tarball e.g.:
DIST=stretch
sudo piuparts --keep-sources-list \
  -b /var/cache/pbuilder/base-$DIST.tgz \
  -l piuparts-package.log \
  -I :etc/buggy-dep \
  --single-changes-list package*_amd64.changes \
  | grep -P '(INFO|ERROR):'
Piuparts doesn’t handle conflicting packages in a single run
(e.g. nginx-light vs. nginx-full); in this case, test each .deb
individually (rather than the full changes).
With newer piuparts (1.5.0), you can avoid using root by using the
unshare backend, and working in a publicly accessible (+x)
hierarchy: drop sudo and add:
'--bootstrapcmd=mmdebstrap --skip=check/empty --variant=apt' \
Reverse dependencies
Identify direct and indirect reverse dependencies with apt
rdepends, e;g. apt
rdepends --recurse --important --follow=Depends,PreDepends,Suggests,Recommends,Conflicts,Replaces
or apt-rdepends -r.
Check dose-ceve from dose-extra for more complex cases, e.g. golang.
reverse-depends
[-b] from ubuntu-dev-tools knows about reverse
build-dependencies but relies on a web service and only works for
Ubuntu.
debusine staging
https://wiki.debian.org/DebusineDebianNet#About_the_.2BIBw-create-experiment.2BIB0_workflow
Example with debusine account nick (without @debian.org) and
project mystaging, testing packages AAA and BBB together, for
bullseye:
apt install debusine-client/trixie-backports
echo 'suffix: "nick-mystaging"' | debusine create-workflow --workspace developers create-experiment

debusine archive suite create --workspace developers-nick-mystaging \
  --architecture amd64 --architecture i386 \
    --architecture arm64 --architecture armhf \
    --architecture all \
  --base-workflow-template upload-to-bullseye-security \
  bullseye-security-mystaging
You may need to edit the new Collection to add contrib or non-free components through the web interface.
If later you add/remove an architecture, you need to modify the Collection, and also modify the workflow template accordingly:
debusine workflow-template edit \
  --workspace developers-nick-mystaging
  publish-to-bullseye-security-mystaging
Upload:
dput -O debusine_workspace=developers-nick-mystaging \
  -O debusine_workflow=publish-to-bullseye-security-mystaging \
  debusine.debian.net AAA_1.0+deb11u1_source.changes
# WAIT until package1 is published, otherwise the staging repo won't be enabled
dput -O debusine_workspace=developers-nick-mystaging \
  -O debusine_workflow=publish-to-bullseye-security-mystaging
  debusine.debian.net BBB_1.0+deb11u1_source.changes
AAA will be available to all BBB jobs (build, autopkgtest, piuparts, etc.), and an APT repository available at: https://deb.debusine.debian.net/debian/developers-nick-mystaging/
Various blockers prevent replacing an existing version (see #1368). A work-around is dropping the Collection and rebuilding from scratch.